Table of Contents
You know that feeling when something’s baking and people start showing up in the kitchen like they have some kind of sixth sense? That’s what happens every single time I make this bread.
Last Thanksgiving, I had it cooling on the counter while everyone was supposed to be watching football in the living room. Within five minutes, the kitchen was packed. My uncle Steve—who literally never compliments anyone’s cooking—asked if he could take half the loaf home. My sister-in-law texted me at 11 PM asking for the recipe. And my nephew, who lives off chicken nuggets and refuses to eat anything with “weird stuff” in it, ate three slices.
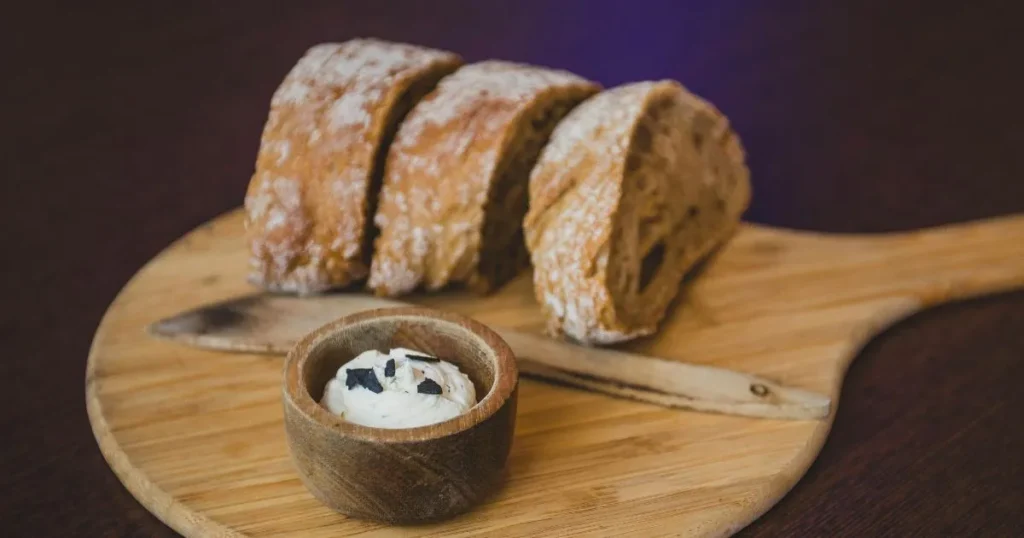
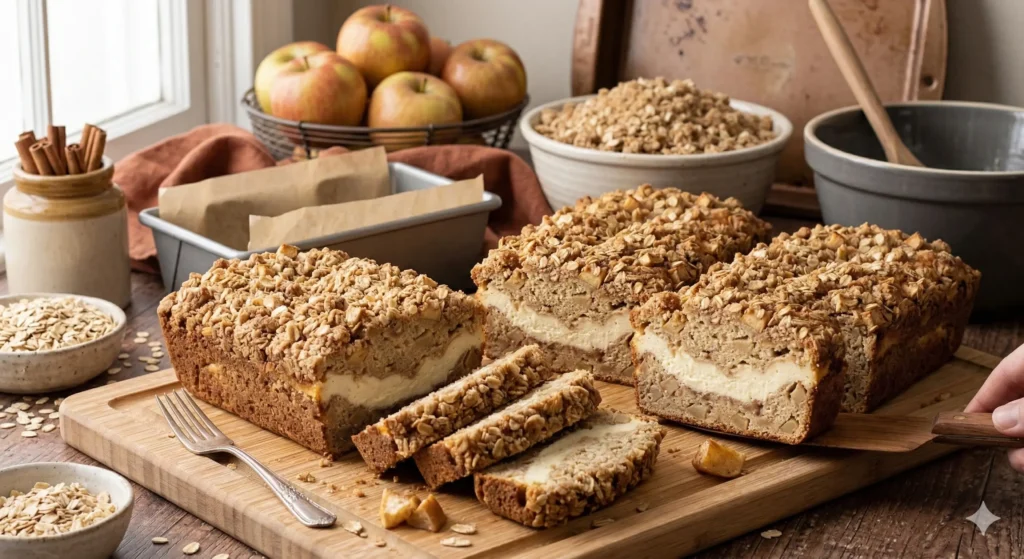
Here’s the thing about this Apple Crisp Cheesecake Bread: it’s stupid easy to make, but it looks and tastes like you spent all day on it. The bottom is this moist apple bread that tastes like fall. The middle has a thick layer of cream cheese that’s tangy and rich. And the top? A crunchy, buttery streusel that’s so good you’ll want to eat it straight out of the bowl.
I’m going to walk you through exactly how to make this, including all the little tricks I’ve figured out after making it probably forty times. No fancy techniques, no weird ingredients you have to order online. Just really, really good bread that’ll make you look like a baking genius.
Why Everyone Freaks Out Over This Bread
Let me tell you what makes this different from every other apple bread recipe out there.
It’s Actually Three Desserts in One
Most apple breads are just… bread with apples in it. Fine, but nothing special. This one has three completely different layers, and somehow they all work together perfectly.
The bottom layer is your classic apple cinnamon bread—moist, packed with apple chunks, and smells incredible while it’s baking. Nothing groundbreaking here, but it’s a solid foundation.
Then you’ve got this cream cheese layer in the middle. Not just a little swirl—I’m talking a legit thick ribbon of sweetened cream cheese that cuts through all the sweetness and makes every bite feel fancy.
The streusel on top is where things get really good. It’s loaded with oats and brown sugar, gets all crispy and caramelized in the oven, and gives you that textural contrast that makes you keep reaching for another piece.
My friend Sarah, who’s usually pretty honest about when recipes are just okay, said it best: “This tastes like if an apple pie and a cheesecake had a baby, and that baby was better than both parents.”
It Feeds a Crowd Without Making You Insane
Family gatherings are stressful enough without having to bake six different things, right? One loaf of this makes 12 to 16 slices, depending on how generous you’re feeling. And if you’re feeding a bigger group, the recipe doubles perfectly—I’ve done it plenty of times.
The best part? You can make it two days ahead. Seriously. It actually gets better after sitting for a day because all the flavors kind of settle in together. So you can bake on Thursday, wrap it up, stick it in the fridge, and pull it out Saturday morning without stressing.
It also travels really well. Unlike cakes with frosting that get destroyed in the car, or cookies that crumble into dust, this bread is basically indestructible. I’ve driven it three hours to my parents’ house, and it looked perfect when I got there.
And can we talk about cost? Everything in this recipe comes from a regular grocery store. No specialty stores, no online ordering, no wondering what the hell mascarpone is and why it costs eight dollars. Just normal stuff you probably already have.
You Can Serve It for Literally Any Meal
Breakfast? Absolutely. Brunch? Even better. Dessert? Of course. That weird time between lunch and dinner when everyone’s hungry but nobody wants to admit it? Perfect.
I’ve served this at Thanksgiving breakfast, Christmas morning, Easter brunch, random Sunday mornings when I felt like baking, book club meetings, and about a hundred coffee dates with friends. It works every time.
My teenage daughter and her friends demolished an entire loaf at 10 AM on a Saturday, which is basically a miracle because getting teenagers to eat anything before noon is like negotiating with terrorists.
What You Actually Need to Make Apple Crisp Cheesecake Bread
Okay, let’s talk ingredients. I’m going to be really specific here because small details matter, and I want yours to turn out as good as mine.
The Bread Part
Here’s what goes into the apple bread base:
Dry Ingredients:
- 2 cups all-purpose flour (spoon it into the measuring cup, don’t pack it)
- ¾ cup sugar (you can do ½ cup if you don’t like things too sweet)
- 2 teaspoons baking powder (check the date—old baking powder is useless)
- ½ teaspoon baking soda
- ½ teaspoon salt (don’t skip it, I know it seems small, but it matters)
- 1½ teaspoons cinnamon (fresh makes a huge difference)
- ¼ teaspoon nutmeg (optional, but really good)
Wet Ingredients:
- 2 eggs (room temperature—I’ll explain why later)
- ½ cup vegetable oil (or melted butter if you’re feeling fancy)
- 2 teaspoons vanilla extract (real vanilla, not the fake stuff)
- ½ cup sour cream (Greek yogurt works too)
- 2 medium Granny Smith apples, peeled and chopped (about 1½ cups)
The Cream Cheese Layer
This part is simple:
- 8 oz cream cheese (ONE BLOCK, and it needs to be soft—this is important)
- ¼ cup sugar
- 1 egg (room temperature)
- 1 teaspoon vanilla
The Streusel Topping
The best part:
- ½ cup flour
- ⅓ cup brown sugar (pack it down when you measure)
- ⅓ cup old-fashioned oats (not instant, they turn to mush)
- 1 teaspoon cinnamon
- 4 tablespoons cold butter (straight from the fridge)
Shopping Tips That Actually Matter
About the apples: Granny Smiths are the move here. They’re tart, they stay firm when you bake them, and they don’t turn into applesauce. I’ve tried this with other apples—Honeycrisp, Fuji, whatever looked good at the store—and they all work okay, but Granny Smiths are genuinely better. Red Delicious are terrible for baking, don’t even bother.
The room temperature thing: I know it seems fussy, but cold cream cheese will NOT mix smoothly. You’ll end up with lumps no matter how long you beat it. Just take it out of the fridge when you start getting everything else ready. Same with eggs—they mix better when they’re not ice cold.
Fresh spices: If your cinnamon has been in your cabinet since 2019, throw it out and get new stuff. Old spices taste like sawdust. Fresh cinnamon smells incredible and actually tastes like something.
Real vanilla extract: Yes, it’s more expensive. Yes, it’s worth it. Imitation vanilla tastes like chemicals. Get the real thing.
How to Actually Make This Thing
Alright, let’s do this. I’m going to walk you through it exactly like I’d explain it to my sister over the phone.
Get Your Stuff Ready First
Turn your oven to 350°F. Don’t wait until you’re halfway through mixing—do it now.
Grease the hell out of a 9×5 loaf pan. I use butter, but cooking spray works. Get into all the corners. If you want to be extra safe (I usually am), line it with parchment paper with some hanging over the edges. Makes it way easier to get out later.
Take your cream cheese and eggs out of the fridge. They need to warm up.
Peel your apples and chop them into small pieces—like half-inch chunks. Try to keep them roughly the same size so they cook evenly.
Get all your ingredients measured and ready. It makes everything go faster, and you won’t forget anything.
Make the Bread Batter
Grab a big bowl and whisk together all your dry stuff: flour, sugar, baking powder, baking soda, salt, cinnamon, and nutmeg. Make sure it’s really mixed so the baking powder gets distributed evenly.
In another bowl, whisk your eggs until they’re a little foamy. Add the oil, vanilla, and sour cream. Whisk it all together until it’s smooth.
Now pour the wet stuff into the dry stuff. Here’s where people mess up: DO NOT OVERMIX. Seriously. Stir it just until you can’t see dry flour anymore. Some lumps are fine—in fact, lumps are good. If you beat the crap out of it, you’ll end up with tough, dense bread that sucks.
Fold in your chopped apples. The batter should look chunky and thick.
Make the Cream Cheese Filling
Beat your softened cream cheese with a mixer until it’s smooth and fluffy. If it’s not soft enough, this will take forever and you’ll still have lumps. Don’t skip the softening step.
Add the sugar, egg, and vanilla. Beat it for about a minute until everything’s completely smooth. It should look like really thick pancake batter.
Make the Streusel
Mix the flour, brown sugar, oats, and cinnamon in a bowl.
Cut up your cold butter into little cubes and add it to the bowl. Use a fork or your fingers to work the butter into the dry stuff until it looks like wet sand with some pea-sized chunks.
If the butter starts getting too warm and melty, stick the whole bowl in the fridge for a few minutes. Cold butter = crispy topping. Melted butter = soggy topping. Don’t mess this up.
Put It All Together
This is where it gets a little tricky, but you’ll be fine.
Spoon half of your apple bread batter into the loaf pan. Spread it out evenly, pushing it slightly up the sides to make a little well in the middle.
Spoon the cream cheese mixture into that well. Keep it away from the edges of the pan—about half an inch in. This keeps it from touching the sides and making a mess.
Now here’s the part where you need to be gentle: spoon the rest of the apple batter over the top. I do little dollops around the edges first, then fill in the middle. Don’t just dump it all in one spot, or you’ll disturb the cream cheese layer.
Spread it carefully to cover the cream cheese completely. It doesn’t have to be perfect—the streusel will cover it anyway.
Sprinkle the streusel all over the top. Press it down very lightly so it sticks.
Bake It
Put it in the oven and set a timer for 60 minutes.
Around the 50-minute mark, start checking it. Stick a toothpick or knife in the center. It should come out with a few moist crumbs on it—not wet batter, but not totally clean either. Some cream cheese might stick to it, which is normal.
The top should be golden brown and the streusel should look crispy. If you want to be really precise, use a thermometer—you’re looking for 200-205°F in the center.
If the top starts getting too dark before the middle is done, cover it loosely with foil.
Let It Cool (This Is Important)
When it comes out, let it sit in the pan for 15 minutes. I know you want to cut into it immediately. Don’t. It needs to set up or it’ll fall apart.
After 15 minutes, run a knife around the edges and lift it out using the parchment paper (if you used it) or just flip the pan over onto a cooling rack.
Let it cool completely—at least 45 minutes, ideally an hour. The cream cheese layer needs time to firm up. If you cut it too early, it’ll be a gooey mess. Still delicious, but messy.
How to Serve It So People Lose Their Minds
Cutting and Serving
Use a serrated knife—the kind you use for bread. Sharp is key.
Wipe the knife between cuts. Otherwise, you get cream cheese buildup that drags through the bread and makes ugly slices.
Cut slices about an inch thick. Thinner falls apart, and thicker is too heavy.
Serve it at room temperature. If it’s been in the fridge, let it sit out for an hour before serving. Cold bread is dense, and the flavors are muted.
What to Serve It With
For breakfast or brunch, I usually put out some whipped cream and maple syrup. Coffee is a must. Sometimes I’ll do a fruit salad on the side to balance out the richness.
For dessert, vanilla ice cream is incredible with this. The warm bread with ice cream? Chef’s kiss. Caramel sauce drizzled on top is also ridiculously good.
For special occasions, I’ll dust powdered sugar on top right before serving. Makes it look fancy with literally zero effort.
Making It Ahead (Because Who Has Time on the Day Of?)
Storage Options
Room temp works for a day or two if you wrap it really well in plastic wrap.
In the fridge, it’ll last about a week. Wrap it in plastic wrap, then foil, then stick it in a container. Keeps it from drying out.
You can freeze this for up to three months. I usually slice it first, wrap each slice in plastic wrap, then put everything in a freezer bag. Then you can grab however many slices you want.
Game Plans for Different Situations
If you’re serving it in 1-2 days: Just bake it, let it cool completely, wrap it up, and stick it in the fridge. Take it out an hour before you need it.
If you want to prep ahead: Mix your dry ingredients the night before and leave them covered on the counter. Make the streusel and stick it in the fridge. Chop your apples and toss them with a little lemon juice, then refrigerate. Next day you can throw it together in like 10 minutes.
If you’re planning way ahead: Bake it, cool it, wrap it really well, and freeze it. The night before you need it, move it to the fridge to thaw. Warm it in a 300°F oven for 10-15 minutes before serving. Nobody will know it was frozen.
When Things Go Wrong (And How to Fix It)
Dense, heavy bread: You overmixed. Next time, stir just until combined and stop.
Cream cheese layer disappeared: You probably didn’t use enough batter on the bottom. Measure carefully and actually use half for the bottom layer.
The top is burnt, but the middle is raw: Your oven runs hot. Get an oven thermometer (they’re like $6) and adjust. Also, tent it with foil after 40 minutes if the top is browning too fast.
Soggy streusel: Your butter was too warm, or there’s too much moisture. Make sure your butter is cold, and if your kitchen is humid, add an extra couple tablespoons of oats to the streusel.
It stuck to the pan: You didn’t grease it enough. Use more butter or spray, and seriously consider parchment paper. It’s worth it.
Mushy apples: Wrong apple variety. Stick with Granny Smiths. Other apples turn to mush.
Dry and crumbly: Overbaked. Check it at 55 minutes and don’t go past 70 minutes total.
Mix It Up: Variations That Actually Work
Once you’ve made the basic version a few times, here are some variations I’ve tried that turned out great:
Caramel version: Swirl caramel sauce into the cream cheese layer and drizzle more on top after baking. Obscenely good.
Maple pecan: Use maple syrup instead of some of the sugar in the bread, and throw chopped pecans in the streusel. Very fall, very delicious.
Cranberry orange: Add dried cranberries with the apples, and use orange zest instead of some of the cinnamon. Perfect for the holidays.
Gluten-free: Use a 1:1 gluten-free flour blend. Add xanthan gum if your blend doesn’t have it. Works surprisingly well.
Look, Here’s the Deal
I’ve made a lot of recipes that people said were “amazing” and turned out to be just okay. This isn’t one of those.
This Apple Crisp Cheesecake Bread is legitimately the best thing I bake. I’ve been making it for three years now, and I’ve probably made it 50 times. It’s my go-to for every family gathering, every potluck, every time someone asks me to “bring something.”
It’s not complicated. You don’t need fancy equipment or hard-to-find ingredients. You just need to follow the steps, don’t overmix the batter, and make sure your cream cheese is soft.
The first time you pull this out of the oven, and people start appearing in your kitchen like magic, you’ll get it. When your picky kids ask for seconds, when your mother-in-law asks for the recipe, when people text you days later saying they can’t stop thinking about it—that’s when you’ll understand why I won’t shut up about this bread.
So grab your ingredients, set aside an afternoon, and make this. Take a picture when you pull it out of the oven because it’s going to look incredible. Slice it up, watch people’s faces when they taste it, and prepare to be asked to make it again for every gathering from now until forever.
Make it this weekend. Seriously. Let me know how it goes—I want to hear about it. And when everyone asks for the recipe, send them here.