Savory Beef and Pepper Rice Bowl: A Quick Homemade Meal for Busy Weeknights
Finding Comfort in a Bowl
God, there’s nothing quite like that first bite of a homemade rice bowl after a long day. You know the one – where tender beef meets sweet peppers over fluffy rice, all swimming in that savory sauce that somehow makes everything better? I stumbled onto beef and pepper rice bowls during one of those weeks when my takeout guy started recognizing my voice on the phone (not my proudest moment).
But that first homemade version changed everything. Standing in my kitchen, tired but triumphant, I realized I’d just made something in 25 minutes that tasted better than what I’d been dropping $18 on multiple times a week. That’s what I want to share with you today – not just a recipe, but a liberation from the takeout trap we’ve all fallen into.
When you cook at home, you’re the boss. Don’t like green peppers? Skip ’em. Want extra garlic? Go wild. There’s something deeply satisfying about creating exactly what you’re craving without compromise. And let’s be real – your wallet will thank you too.
Table of Contents
What Really Makes a Killer Beef and Pepper Rice Bowl?
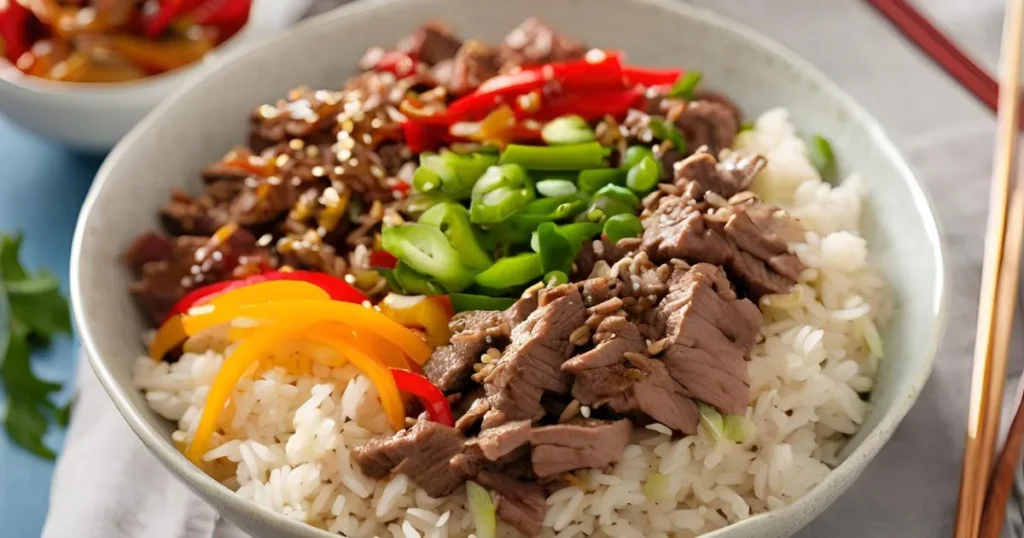
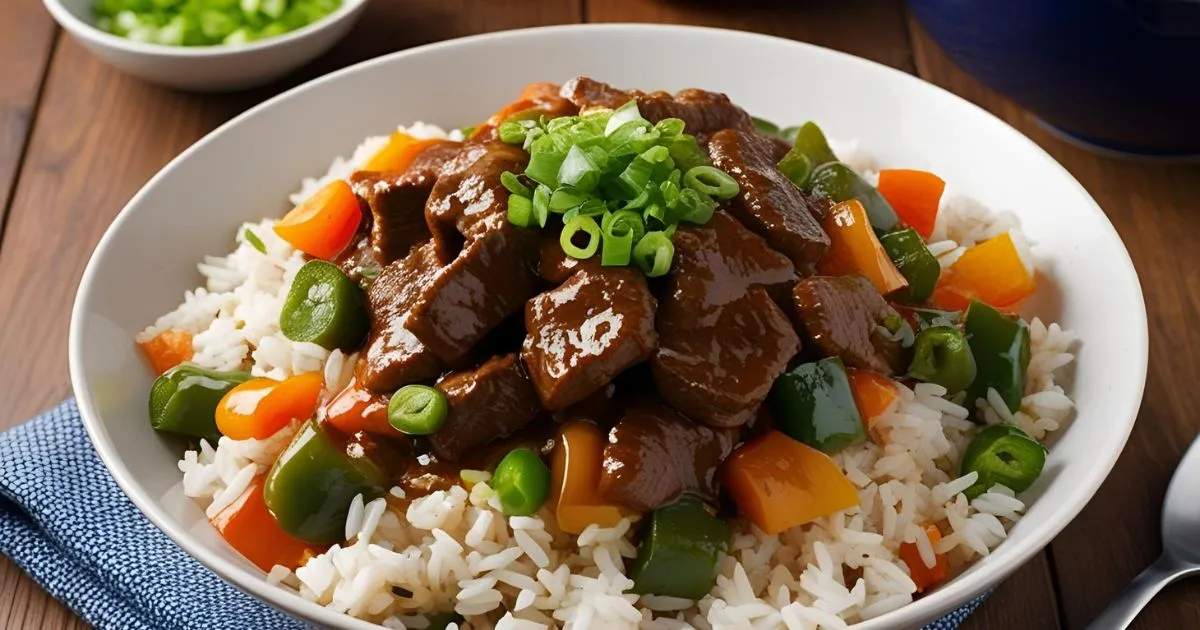
Let’s talk about what separates a “meh” rice bowl from one that makes you close your eyes and do that little chair dance of food happiness. It’s all about balance and contrast – crispy-edged beef against tender-crisp peppers, the subtle sweetness playing against savory umami, and that magical sauce that ties everything together.
The beef should have those slightly caramelized edges – you know, the bits you fight over – while still being juicy inside. The peppers must keep their personality, not surrender to sad, soggy submission. And underneath it all, rice that’s done right – fluffy and distinct, not the gluey mass that haunts college dorm cooking.
But honest talk? The sauce is where the magic happens. A great sauce should hit you in waves – first savory, then maybe a hint of sweetness, followed by aromatics that make your kitchen smell like the best restaurant in town. When done right, it coats everything with clingy goodness without drowning your creation.
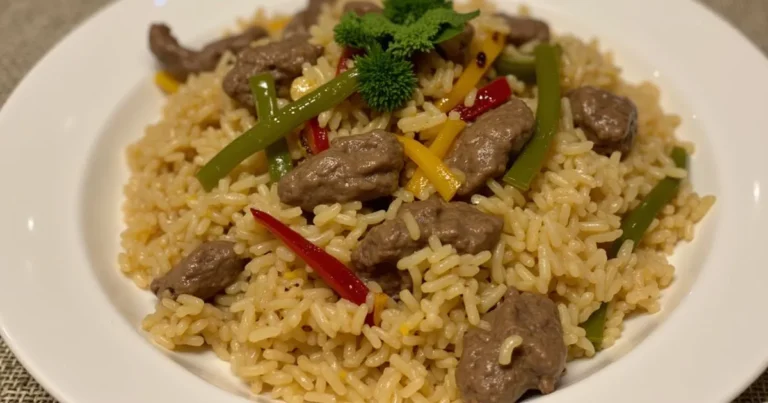
What I love most about this dish is how it delivers full-meal satisfaction in a single bowl. You get your protein, your carbs, your veggies – all playing together perfectly. And once you nail the basic version? The door’s wide open for you to riff on it endlessly based on whatever’s in your fridge or what you’re craving that night.
What You’ll Need to Make Magic Happen
For the Beef and Peppers
| Ingredient | Quantity | Notes |
|---|---|---|
| Beef sirloin or flank steak | 1 pound (450g) | Thinly sliced against the grain |
| Bell peppers | 3 medium | Mix red, yellow, and green for the best color (and Instagram appeal) |
| Onion | 1 medium | Thinly sliced |
| Garlic | 3 cloves | Minced (or more, I won’t judge) |
| Ginger | 1 tablespoon | Freshly grated is worth the effort here |
| Vegetable oil | 2 tablespoons | For stir-frying |
For the Flavor Bomb Sauce
| Ingredient | Quantity | Notes |
|---|---|---|
| Soy sauce | 3 tablespoons | Low-sodium if you’re watching salt intake |
| Beef broth | 1/4 cup | The secret depth-builder |
| Brown sugar | 1 tablespoon | Trust me on this one |
| Cornstarch | 1 teaspoon | The magical thickener |
| Sesame oil | 1 teaspoon | Don’t skip this flavor powerhouse |
| Black pepper | 1/2 teaspoon | Freshly ground makes a difference |
For Serving
| Ingredient | Quantity | Notes |
|---|---|---|
| Steamed rice | 4 cups | White or brown – you do you |
| Green onions | 3 stalks | Sliced on a diagonal to feel fancy |
| Sesame seeds | 1 tablespoon | For that restaurant-style finish |
| Hot sauce | To taste | For heat-seekers only |
Look, I’m not going to lie to you – quality matters here. When a dish has so few ingredients, each one needs to pull its weight. That doesn’t mean you need to blow your budget on wagyu beef (though if you want to, invite me over), but try to get meat with decent marbling. Those little streaks of fat are flavor insurance, keeping everything juicy as it cooks.
For peppers, firm and glossy is what you’re after. The multi-colored approach isn’t just for looks – each color actually brings slightly different flavors to the party. Green peppers have that slightly bitter, grassy note that balances the sweetness of their red and yellow cousins.
The Tools You’ll Need
Before you dive in, make sure you’ve got these basics on hand:
- A decent-sized wok or skillet (12-inch minimum)
- A sharp knife (seriously, a dull knife will make this miserable)
- Cutting board
- A couple mixing bowls
- Rice cooker or pot with a tight-fitting lid
- Measuring cups and spoons
- Wooden spoon or heat-resistant spatula
Don’t stress if you don’t have a professional work setup with jet-engine flames. This recipe is forgiving. What does matter is having a pan large enough that your ingredients have room to sear rather than steam. Overcrowding is the enemy of good stir-fry – when ingredients are packed too tightly, they release moisture and stew rather than developing those beautiful browned edges we’re after.
Let’s Make This Happen
1. Get That Rice Going
Start here because rice needs time to do its thing, and there’s nothing worse than having your stir-fry ready with no rice in sight.
- Measure your rice and give it a good rinse until the water runs mostly clear. Yes, this step matters – it gets rid of excess starch that can make your rice sticky in a bad way.
- Cook according to your preferred method. If you’re using a rice cooker, you’re living your best life. If stovetop, use a 1:1 ratio for white rice or 1:1.25 for brown.
- Once it’s done, leave it alone for 10 minutes with the lid on. I know, it’s tempting to peek, but that rest period lets the moisture distribute evenly.
- Fluff with a fork when you’re ready for it. Those distinct grains are what you’re after.
2. Prep Your Players
Good prep makes the actual cooking stress-free. This is where the magic starts.
- Throw your beef in the freezer for about 15-20 minutes – not to freeze it solid, just to firm it up. This makes slicing thin a breeze rather than a struggle.
- Meanwhile, break down your peppers – remove the seeds and white membranes, then slice into strips about the width of your pinky finger.
- Slice your onion into similar-sized pieces.
- Mince that garlic finely and grate your ginger. A microplane makes the ginger part nearly effortless.
- Once your beef has firmed up, take a look at the direction of the muscle fibers (the “grain”). Your knife needs to go perpendicular to those lines – this is non-negotiable if you want tender beef.
- Slice as thinly as you can manage, aiming for about 1/8-inch thick. Return to room temperature before cooking.
That partial freezing trick is a game-changer. It transforms beef from a wobbly nightmare to slices into something that stays put under your knife. Those thin slices mean quick cooking and tender results – the hallmark of restaurant-quality stir-fry.
3. Mix Your Sauce Magic
The sauce is where your kitchen alchemist moment happens.
- Grab a bowl and mix your soy sauce, beef broth, and brown sugar. Whisk until the sugar dissolves.
- Add your freshly ground black pepper.
- In a separate small bowl (yes, another dish to wash, I know, but it’s worth it), mix the cornstarch with a tablespoon of cold water until it looks like milk.
- Add this cornstarch slurry to your sauce mixture. This is what will give your sauce that perfect clingy texture later.
- Stir in the sesame oil last. Adding it at the end preserves its aromatic punch.
This sauce hits all the right notes: savory depth from the soy and beef broth, subtle sweetness from the brown sugar, warmth from the pepper, and that distinctive nutty finish from sesame oil. The cornstarch is your insurance policy against watery sauce disappointment.
4. Sear That Beef Right
This is where patience pays off big time. Stay focused here – things move fast.
- Get your pan screaming hot. Like, water-droplet-instantly-evaporates hot. This is crucial.
- Add your first tablespoon of oil and swirl to coat.
- Carefully lay in your beef slices – try for a single layer without overcrowding. You might need to work in batches, which is totally fine.
- Here’s the hard part: LEAVE IT ALONE for 60-90 seconds. Seriously. Don’t poke, don’t stir, don’t fuss. Let that hot pan work its magic.
- Once you see a nice brown crust forming on the bottom, then you can stir and cook for another minute.
- You’re looking for beef that’s browned outside but still has a hint of pink inside. It’ll finish cooking later.
- Transfer to a plate, leaving behind any tasty juices in the pan.
That first hands-off minute is where the magic happens. It’s called the Maillard reaction – the scientific term for that beautiful browning that creates hundreds of new flavor compounds. Stirring too soon robs you of this flavor development and can turn your beef gray and sad.
5. Get Those Veggies Singing
Now the aromatics and peppers get their moment.
- If your pan looks dry, add that second tablespoon of oil.
- Toss in your sliced onions and stir-fry for about a minute until they start to soften and turn translucent at the edges.
- Add your garlic and ginger, stirring constantly for 30 seconds. They’ll smell amazing, but watch carefully – burnt garlic is bitter and will ruin everything.
- Add your pepper strips and crank the heat if it’s dropped. Toss everything frequently.
- Give them 2-3 minutes until they brighten in color and get those lovely little charred spots, but still have some crunch.
The key here is keeping your vegetables vibrant and lively. They should soften just enough to be pleasant to eat while maintaining texture. Limp, lifeless peppers are the hallmark of mediocre stir-fry. We don’t do mediocre.
6. Bring It All Together
Now for the satisfying finale – watching everything come together.
- Return your beef to the pan, along with any juices that collected on the plate. That’s pure flavor you’re adding back.
- Pour your sauce over everything in one smooth motion. It should sizzle dramatically.
- Stir continuously as the sauce bubbles up and begins to thicken. This happens quickly – usually within a minute.
- What you’re watching for: a sauce that coats the back of your spoon and leaves a clear path when you run your finger through it.
- Do a quick taste test and adjust if needed. Need more salt? Add a splash more soy. Want more kick? Grind in more pepper.
- Kill the heat and let everything hang out together for a minute. This rest period lets the flavors meld.
This moment, when everything comes together in a glossy harmony, is pure kitchen satisfaction. The sauce should thicken just enough to cling lovingly to each piece of beef and pepper without becoming gloppy. If it gets too thick, a splash of broth or water will bring it back to perfect consistency.
7. Serve It Like You Mean It
Presentation matters, even when you’re just feeding yourself on a Tuesday.
- If you can, warm your serving bowls by running them under hot water and drying them quickly. It keeps your food hot longer.
- Spoon a generous portion of rice into each bowl. Create a slight well in the center.
- Ladle your beef and pepper mixture onto the rice, slightly off-center for visual appeal. Let some of that sauce drip down into the rice.
- Scatter sliced green onions over the top. They add color, freshness, and a zippy flavor contrast.
- Sprinkle with sesame seeds for that restaurant-worthy finish.
- Set out hot sauce for the heat-seekers at your table.
That little touch of warming the bowls? Total game-changer, especially in winter. Food cools quickly once served, and this simple step keeps everything at the perfect temperature longer.
Pro Tips From My Kitchen to Yours
After making this dish more times than I can count, here are some insider tips:
- The right beef makes a difference: Flank and sirloin are great, but ribeye will blow your mind if you’re splurging. For budget options, chuck steak works surprisingly well when sliced paper-thin.
- Heat management matters: If your pan starts cooling down during cooking, you’ll get steamed meat instead of seared. Work in smaller batches if needed to keep that heat constant. Let your pan recover between batches.
- Freeze more than the beef: Chill your mixing bowl before combining meat with marinade if you’re prepping ahead. It keeps everything food-safe longer.
- Get organized: Set up your ingredients in order of use so you’re not frantically hunting for garlic while your beef overcooks. Professional chefs call this mise en place, but I call it “saving myself from cooking disasters.”
- Umami booster: Add a teaspoon of mushroom powder to your sauce for mind-blowing depth. It’s my secret ingredient that makes people ask, “What IS that amazing flavor?”
- Rice upgrade: Soaking your rice for 30 minutes before cooking might seem fussy, but the improvement in texture is remarkable – each grain cooks more evenly.
Make It Your Own: Variations to Try
Once you’ve nailed the classic version, why not experiment?
Switch Up Your Protein
- Chicken thigh strips: They stay juicy even with high-heat cooking. Bonus: usually cheaper than beef.
- Pork tenderloin: Sliced thin, it cooks as quickly as beef with a slightly sweeter profile.
- Shrimp: They cook in literally one minute, making this an even faster dinner option.
- Tofu: Press extra-firm tofu well, then cut into cubes. A brief marinade in soy sauce gives it flavor throughout.
Vegetable Mix-Ins
- Broccoli florets: Give them a 30-second blanch in boiling water before adding to keep that vibrant green.
- Sugar snap peas: Add whole for sweet crunch that complements the peppers beautifully.
- Mushrooms: Shiitakes bring incredible umami that makes the beef taste even beefier.
- Baby spinach: Toss in right at the end just until wilted for a nutrient boost and color contrast.
Flavor Twists
- Chinese-takeout vibes: Add a tablespoon of oyster sauce to your base recipe. It adds that indefinable “restaurant” quality.
- Thai-inspired: Add fish sauce, lime juice, and finish with fresh basil leaves and crushed peanuts.
- Korean heat: Mix in some gochujang (Korean chili paste) for sweet-spicy depth that’s addictive.
- Japanese notes: A splash of mirin (sweet rice wine) and a garnish of pickled ginger brightens everything up.
The joy of cooking at home is making dishes truly yours. These aren’t different recipes – they’re variations that let you use what you have or match your mood without learning entirely new techniques.
Saving Your Future Self: Make-Ahead and Storage Tips
We all have those weeks. These strategies make life easier:
- Weekend prep: Slice beef and vegetables up to a day ahead, storing them separately in airtight containers. Pro tip: store prepped garlic and ginger in a tiny jar covered with oil to preserve flavor.
- Sauce on standby: Mix your sauce (minus the cornstarch slurry) up to three days ahead. Keep it in a jar with a tight lid in the refrigerator. Add cornstarch just before cooking.
- Rice in reserve: Make double the rice and refrigerate half. To revive refrigerated rice, sprinkle with a few drops of water before microwaving covered, or steam briefly in a basket over simmering water.
- Storing leftovers: Keep in airtight containers for up to three days. The flavors actually improve overnight as everything melds together.
- Freezer strategy: If you’re planning to freeze portions, slightly undercook the vegetables so they don’t turn mushy when reheated. Separate components if possible, combining after thawing.
- Reheating without ruining: Microwave with a damp paper towel laid over the top, or gently reheat in a pan with a tablespoon of water to rehydrate the sauce.
The Bottom Line: Why You Should Make This Tonight
Let’s be real. After a day of meetings, deadlines, kid wrangling, or whatever your personal brand of chaos involves, cooking can feel like just one more chore. I get it. But this dish – this simple, 30-minute miracle – might just change your relationship with your kitchen.
It’s not just about the money you’ll save (though skipping takeout adds up fast). It’s about creating something with your own hands that actually tastes better than what comes in those plastic containers. There’s a satisfaction there that delivery apps can’t match.
As you get comfortable with this recipe, you’ll find yourself riffing on it, making it truly yours. Maybe you’ll add a splash of rice vinegar because you like things tangy, or double the garlic because nobody’s going to tell you not to. That’s the beauty of cooking for yourself – you set the rules.
So tonight, when that “what’s for dinner?” panic starts to creep in, remember that you’re just 30 minutes away from this bowl of savory perfection. Your future self will thank you – not just for the delicious meal, but for the newfound confidence that comes from knowing you can create something this good, this quickly, anytime you want.
Give it a try. What have you got to lose, except maybe your delivery guy’s phone number?
Your Burning Questions, Answered
What cut of beef works best for a beef and pepper rice bowl?
Flank steak, sirloin, or ribeye will give you the best results. The secret isn’t just the cut, though – it’s slicing across the grain (those muscle fibers) that makes the biggest difference. Even a tougher cut becomes tender when you cut it right and cook it quickly.
Can I use frozen peppers when fresh aren’t looking great?
Absolutely. Frozen peppers are pretty decent in a pinch. They’ll release more moisture, so here’s the trick: thaw them completely, then spread them on paper towels and press gently to remove excess water before cooking. They won’t have quite the same crispness, but in winter, when fresh peppers are expensive and sad-looking, frozen can save the day.
My family likes different spice levels. How can I make this work for everyone?
Make the base recipe mild and set up a “spice bar” with options. Sriracha, red pepper flakes, sliced fresh chilis, chili oil – let everyone doctor their bowl. This approach works especially well for families with kids who might be in their “nothing spicy” phase (we’ve all been there).
I need to make this gluten-free. What should I swap?
Traditional soy sauce contains wheat, so you’ll need to swap in tamari (look for bottles specifically labeled gluten-free) or coconut aminos (which have a slightly sweeter profile you might actually prefer). Also, double-check your beef broth – some contain additives with hidden gluten. Most cornstarch is gluten-free, but verify the packaging to be certain.
I’m trying to meal prep. How far ahead can I make components?
You’re speaking my language! Slice your meat and vegetables up to 24 hours ahead, storing them separately. Mix your sauce (without the cornstarch) up to three days ahead. Cook rice a day before and refrigerate. When mealtime hits, you’re just minutes away from bringing it all together. The actual stir-frying should be done fresh for best texture, but with your prep done, that’s just 10 minutes from start to finish.
Rice always trips me up. What’s your foolproof method?
For white rice, the ratio that never fails me is 1:1 – one cup rice to one cup water. Rinse the rice until the water runs mostly clear, combine with water in your pot or rice cooker, bring to a boil, then immediately reduce to the lowest possible simmer and cover. Set a timer for exactly 15 minutes, then remove from heat and let stand, still covered, for 10 more minutes. Fluff with a fork, not a spoon – it makes a difference! For brown rice, use a 1:1.25 ratio and cook for 35-40 minutes.

