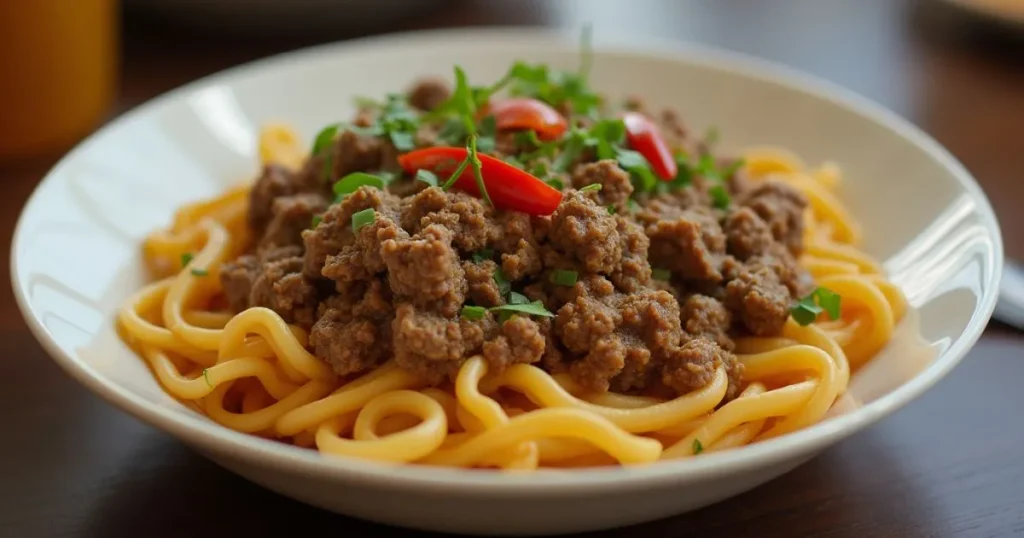
Look, I’m gonna level with you – this recipe saved my butt during that hellish stretch when my kids were in elementary school, my husband was traveling for work every other week, and I was trying to keep my freelance business afloat without losing my mind. One-pot ground beef and noodles became my Wednesday night superhero.
After forgetting to defrost chicken for the third time in a month (mom brain is REAL), I threw together what was supposed to be a “just this once” meal with stuff from my pantry. Fast forward five years, and my oldest still requests this when he’s home from college. Go figure!
Table of Contents
The Magic of One-Pot Ground Beef and Noodles
Why One-Pot Meals Deserve a Place in Your Cooking Rotation
I used to be one of those people who thought “proper cooking” meant dirtying every dish in my kitchen. Then life happened. My dishwasher broke during a week when my husband was in Seattle, both kids had different sports practices, and I had three deadlines. That was my one-pot cooking conversion moment!
There’s something almost magical that happens when you cook everything together:
- The noodles soak up all the beefy goodness instead of watching flavor go down the drain
- You’ve got literally ONE pot to wash (hallelujah!)
- You can actually help with math homework or fold laundry while dinner makes itself
- Nobody can tell if you’re still in your work clothes or if you changed into the leggings with the hole in the butt (my personal favorite)
- Your kitchen doesn’t get that swampy feeling from five burners going at once
My sister-in-law (the “I make everything from scratch” one) turned her nose up at this method until she had twins. Now she texts me for one-pot recipes weekly. Vindication!
The History Behind This Comfort Classic
So I went down a rabbit hole one night (you know, one of those ca n’t-sleep-so-I ll-research-random-stuff moments) and discovered this dish has some serious roots. Versions of ground beef and noodles have been staples in Eastern European cooking forever, particularly in Hungarian and German traditions.
My neighbor Kathy is Hungarian, and she told me her grandmother made something called “Húsos tészta”, which sounds pretty darn similar. These hearty, budget-friendly meals got families through brutal winters and tough times when fancy ingredients weren’t an option.
The American versions started showing up in those spiral-bound community cookbooks in the ’50s and ’60s. You know the ones – with the oddly specific jello molds and casseroles featuring cream of mushroom soup? Those gems! Turns out our grandmothers were onto something with these one-dish wonders.
Essential Ingredients
Ingredient List Table
| Ingredient | Quantity | Notes |
|---|---|---|
| Ground beef | 1 pound | 85/15 is the sweet spot – trust me on this |
| Egg noodles | 8 ounces | The wide ones, not those skinny things |
| Yellow onion | 1 medium | Diced (about a cup if you’re measuring, which I never do) |
| Garlic | 3 cloves | Or 5. I’m a garlic fiend. Judge me. |
| Beef broth | 2 cups | From a box is fine! Who makes homemade for a weeknight? |
| Water | 1 cup | From the tap. Nothing fancy. |
| Olive oil | 1 tablespoon | The everyday stuff, save the fancy bottle |
| Worcestershire sauce | 1 tablespoon | The secret weapon nobody can pronounce |
| Dried thyme | 1 teaspoon | Or that mystery Italian herb blend from the back of your cabinet |
| Paprika | 1 teaspoon | Regular or smoked – dealer’s choice |
| Sour cream | 1/2 cup | Full-fat. Life’s too short for low-fat sour cream. |
| Salt and pepper | To taste | Be generous with both! |
| Fresh parsley | Handful | If I remembered to buy it (spoiler: I usually don’t) |
| Parmesan cheese | As much as you want | The real stuff if you’re feeling fancy |
Understanding Ingredient Roles
The Foundation: Ground Beef
I’ve made this with fancy grass-fed organic beef and with the “manager’s special” discounted pack. Here’s the truth: as long as you’ve got an 85/15 fat ratio, you’re golden. Too lean and it’s dry as the Sahara; too fatty and you’re skimming grease for days.
Last month, I tried the 93/7 stuff because it was on sale, and my husband asked if I “changed the recipe.” That’s how noticeable the difference is!
The Star: Egg Noodles
During the Great Pandemic Pasta Shortage of 2020, I tried making this with every pasta shape in my pantry. Spaghetti? Turned into a gluey mess. Penne? Took forever to cook through. Egg noodles are non-negotiable here – they cook quickly and somehow maintain their texture even when reheated.
My mother-in-law suggested I try making homemade noodles once. I laughed so hard I snorted coffee through my nose. Maybe when the kids are in college!
The Flavor Enhancers
The onion/garlic combo is pretty standard, but that Worcestershire sauce? Game. Changer. I discovered this by accident when I was making this during a particularly chaotic evening. My youngest was having a meltdown about homework, the dog had just thrown up on the carpet, and I grabbed the wrong bottle from the fridge door. Best mistake ever!
The Creamy Finish
The sour cream trick I stole from my college roommate’s mom. She made this beef stroganoff thing that I still dream about. The sour cream cuts through all that richness and pulls everything together. Just PLEASE remember to take it out of the fridge early. Nothing worse than those white streaks that happen when cold sour cream hits hot food. Not that I’d know from experience or anything…
Kitchen Equipment Needed
Essential Tools
- A big ol’ skillet or Dutch oven (the blue one I got as a wedding gift 15 years ago is my go-to)
- Wooden spoon (still have burn marks on one from leaving it in the pan too long during a phone call)
- Measuring cups and spoons (or just eyeball it like I do 90% of the time)
- Knife and cutting board
- Kitchen timer (because I WILL forget about it otherwise)
Nice-to-Have Equipment
- Cheese grater for the Parmesan (though the pre-grated stuff in the deli section works in a pinch)
- Garlic press (life-changing if you hate mincing garlic)
- Those fancy herb scissors I keep seeing on Instagram that I’ll probably buy after three more glasses of wine and late-night online shopping
Step-by-Step Cooking Process
Phase 1: Building the Foundation (10 minutes)
- Prep ingredients: Chop your onion, get your garlic ready, and gather everything else. I’ve learned the hard way that searching for thyme while your meat burns is no fun. And yes, I’ve done this more times than I care to admit.
- Heat the pan: Get that pan nice and hot. Medium-high heat. Add your olive oil and swirl it around. You want it shimmery but not smoking – that point where your kitchen starts to smell good but the smoke detector isn’t threatening to go off.
- Brown the beef: Dump in your ground beef and break it up. Now, this is crucial – LEAVE IT ALONE for a minute or two. Let it develop some color before you start smashing and stirring. I usually use this time to check Instagram or referee whatever argument my kids are having.
- Add onions: Once the beef is mostly browned, throw in those onions. They’ll soak up all that beefy goodness while softening. Give it 3-4 minutes until they’re translucent and your kitchen smells amazing.
- Garlic time: Toss in the garlic for just 30 seconds. Learned this timing the hard way after burning it while taking a work call. Burnt garlic = start over or order pizza.
Pro Tip: Proper Browning Technique
Fight every instinct you have to constantly stir that meat! I know it’s weirdly satisfying, but if you want real flavor, you need to let it develop a crust. My husband swears he can tell when I’ve rushed this step. He’s annoyingly right.
Phase 2: Creating the Sauce Base (5 minutes)
- Season the mixture: Sprinkle in the thyme, paprika, plenty of black pepper, and some salt. My heavy hand with black pepper comes from my dad, who’d add so much that mom would “accidentally” knock over his plate. Some family traditions just stick!
- Deglaze the pan: Pour in that beef broth, water, and Worcestershire sauce. That sizzling sound? That’s the sound of flavor happening. Your kitchen should smell incredible right about now.
- Scrape up browned bits: Get in there with your wooden spoon and scrape all those browned bits off the bottom. My grandma called this “pan treasure” and would smack my hand if I didn’t get every last bit. The woman was tiny but terrifying.
Liquid Ratios Matter
After making this approximately 387 times, I’ve found that 3 cups total liquid to 8 ounces of noodles is the magic ratio. I once accidentally doubled the broth but not the noodles. We called it “beef noodle soup” that night and pretended I meant to do it. Fake it till you make it!
Phase 3: One-Pot Magic (10 minutes)
- Add noodles: Dump those uncooked noodles right into the bubbling liquid. I know it feels wrong the first time. Trust the process! I still get a little thrill watching dry pasta go straight into the sauce.
- Ensure submersion: Press them down so they’re mostly covered. Some will stick up – just keep pushing them down as they soften. It’s like playing whack-a-mole with pasta.
- Simmer: Keep it at a gentle bubble, stirring occasionally. This is your chance to unload the dishwasher, help with homework, or just stare into space for a blessed 8 minutes of peace.
- Test for doneness: After about 8 minutes, fish out a noodle and taste it. You want it tender but not mushy. Nobody likes mushy pasta. Nobody.
- Adjust consistency: If things are looking dry but the noodles aren’t done, add a splash more water. Better to add a little at a time than end up with beef noodle soup (again).
Visual Cues for Perfect Doneness
You know you’re getting close when:
- The noodles have plumped up and most of the liquid is absorbed
- You can drag your spoon through and see the bottom of the pan briefly
- Your family is hovering around asking “how much longer?” every 30 seconds
- The dog has planted himself firmly at your feet
Phase 4: Finishing Touches (5 minutes)
- Remove from heat: Take that pan off the burner entirely. The residual heat will keep cooking things otherwise.
- Stir in sour cream: Add room temperature sour cream (please learn from my many failures here) and stir until it’s all combined and silky looking.
- Let it rest: Give it 5 minutes to chill out. I know it’s tempting to dive in, but that little rest makes all the difference in texture. Use this time to pour yourself a glass of wine. You’ve earned it.
- Final flourish: Sprinkle with parsley and Parmesan if you’re using them. I usually forget the parsley unless my mother is coming over and I’m trying to impress her. (Still trying after 40+ years!)
Flavor Variations and Additions
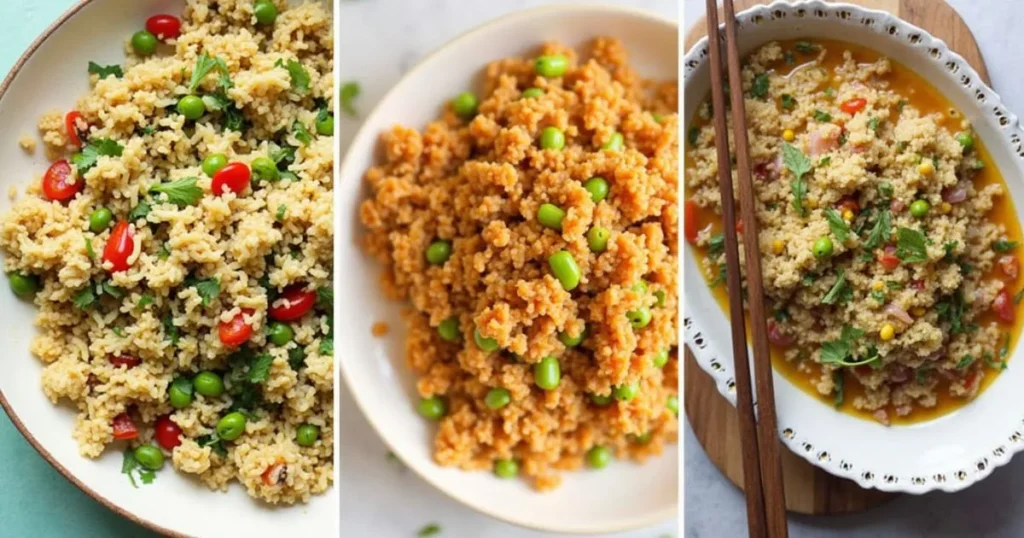
International Flavor Profiles
Same cooking method, whole different vibe:
- Italian-ish: Add Italian seasoning, a blob of marinara from that jar in the fridge, and top with mozzarella. My 12-year-old calls this “pizza pasta” and actually eats vegetables when I make it this way.
- Tex-Mex Fiesta: Swap out the thyme for taco seasoning, add a can of drained black beans, and finish with cilantro and lime. Top with crushed tortilla chips if you’re feeling fancy. Great for using up the bottom-of-the-bag chips!
- Sorta Asian: Use soy sauce instead of Worcestershire, add some ginger, and top with green onions. My husband LOVES this version, especially after his business trips to Japan left him with a serious Asian food craving.
- Mediterranean Vacation: Toss in some olives, oregano, and top with feta. I created this version during Covid lockdown when we had to cancel our Greece trip. Not quite Santorini, but it helped!
Vegetable Boosters
For when you’re feeling guilty about the lack of green things in your diet:
- Mushrooms: Finely chop about a cup and cook them with the onions. They practically disappear, and even my mushroom-detecting son doesn’t notice them.
- Bell peppers: Dice them small and they cook down nicely. The red ones are sweetest and least likely to be picked out by vegetable investigators (aka children).
- Spinach: Two giant handfuls look like WAY too much but will wilt down to practically nothing. Add just before the sour cream.
- Frozen peas: Throw in a cup during the last 3 minutes. They add color, sweetness, and count as a vegetable serving in my book!
Healthier Adaptations
| Original | Healthier Option | Reality Check |
|---|---|---|
| Ground beef (85/15) | Ground turkey (93/7) | Not quite as rich, but still good. Add extra seasonings! |
| All beef | Half beef, half mushrooms | My sneaky move that nobody has caught yet |
| Regular egg noodles | Whole wheat egg noodles | Slightly nuttier taste. Kids notice but will eat if hungry enough |
| Sour cream | Greek yogurt | Tangier but works fine. Don’t use non-fat – it’s sad and watery |
| Regular beef broth | Low-sodium bone broth | Honestly? Can barely tell the difference |
Nutritional Benefits
Macronutrient Balance
Each serving gives you:
- Protein: Around 28g from the beef and dairy – this is why you’re not starving an hour later like with some quick meals
- Carbs: About 35g from those noodles – enough for energy without the pasta coma
- Fat: Roughly 19g – and yes, some fat is GOOD for you, despite what 1990s diet culture tried to tell us
Micronutrient Highlights
Beyond just tasting good, you’re also getting:
- Iron: Especially important for women. Low iron = why you feel like a zombie by 3pm
- Zinc: Keeps your immune system functioning when your kid brings home the classroom plague
- B Vitamins: Particularly B12 from the beef, which keeps your brain working (mostly)
- Selenium: An antioxidant most people don’t get enough of but is super important
Storage and Reheating Tips
Proper Storage Guidelines
| Storage | How Long | Container | Notes |
|---|---|---|---|
| Fridge | 3-4 days | Any container with a lid | Day 2 actually tastes BETTER than day 1 |
| Freezer | Up to 3 months | Freezer containers or bags | Label it or play “mystery meal” later |
Optimal Reheating Methods
- Stovetop Revival:
- Low and slow is the way to go
- Add a splash of broth or even just water
- Stir occasionally until it’s hot all the way through
- This keeps the noodles from getting that weird microwave texture
- Microwave Method:
- For when you’re eating lunch at your desk or in a hurry
- Add a tiny bit of water
- Cover with a damp paper towel (or don’t and clean the microwave later)
- 70% power, 1-minute bursts, stir between
- Meal Prep Strategy:
- Sunday night: Make the meat sauce part
- Store in fridge up to 2 days
- Weeknight: Heat sauce, add fresh noodles, done!
- 20-minute dinner that tastes like you spent an hour
Serving Suggestions
Complementary Side Dishes
- Green Things: A basic side salad or some steamed broccoli adds color and makes you feel virtuous. Nothing complicated because WHO HAS THE ENERGY?
- Bread Options: Garlic bread from the freezer section or those heat-and-eat rolls make this feel like a proper meal. Plus, excellent for sopping up extra sauce!
- Drink Pairings: Red wine for grown-ups (I go for whatever’s on sale, honestly), chocolate milk for kids (our house rule for comfort food night).
Presentation Ideas
- Family Style: Just plunk that pot right in the middle of the table with a trivet underneath. One less dish to wash is ALWAYS the right choice.
- Weeknight Fancy: On particularly rough days when you need a win, serve in actual bowls instead of the plastic ones with faded superheroes on them. Light a candle. Pretend you’re civilized.
- Leftovers Reinvented: When we’re tired of eating the same thing, I throw leftovers in a baking dish, top with cheese, and broil until bubbly. Everyone thinks it’s a new meal. Mom magic!
Conclusion
I’ve lost count of how many times this one-pot ground beef and noodles recipe has saved dinner at my house. It’s seen us through sports seasons, work deadlines, homework meltdowns, and those nights when the takeout budget was already blown for the month.
What I love most is how adaptable it is—make it exactly as written when you’re too tired to think, or doctor it up when you’re feeling creative. The techniques here (proper browning, one-pot pasta cooking, sauce building) will serve you well beyond just this recipe.
I still remember my pickiest eater taking his first bite years ago—that moment of silent chewing followed by “This is good!” still ranks as one of my top mom victories. Food connects us to memories and each other when life is pulling us in fifteen different directions.
Try this recipe next time you’re staring into your fridge wondering what to make. Then drop a comment below or tag me if you post it! Nothing makes my day more than seeing how recipes take on new life in different kitchens. Did your family ask for seconds? Did you discover a variation that works even better? I want all the details!
Frequently Asked Questions About Ground Beef and Noodles
What type of noodles work best for this one-pot deal?
After the Great Pasta Experiment of 2020 (when I tried every shape in my pantry), egg noodles win by a mile. They cook quickly and hold their shape without turning mushy. The medium-width ones are my go-to, but the wide ones work great too. In a pinch, rotini or fusilli can sub in—their cooking time is similar and all those ridges grab onto the sauce beautifully.
Can I make this ahead of time?
You bet your overbooked calendar you can! I regularly make a double batch on Sunday nights. The finished dish keeps in the fridge for up to 4 days—just add a splash of broth when reheating to bring back the moisture. For maximum freshness, another option is to make just the meat sauce portion ahead and add fresh noodles right before serving. Perfect for those nights when everyone’s racing in from different activities!
My ground beef and noodles came out kinda bland. Help?
Been there! First, check your browning technique—rushing that step costs you MAJOR flavor. Season at each stage rather than all at once. Try beef stock instead of broth for more richness (the stock concentrate paste is my secret weapon). Don’t skimp on the Worcestershire, and make sure you’re using enough salt and pepper. Still meh? Try a dash of soy sauce or even a tiny bit of tomato paste for umami depth.
Does this freeze well, or will it turn to mush?
I keep emergency portions in my freezer at all times! It actually freezes surprisingly well for about 3 months. The trick is to slightly undercook the noodles if you know freezing is in their future. Thaw overnight in the fridge if you’re planning ahead, or use the defrost setting if you’re in “oh crap, dinner” mode. A sprinkle of fresh herbs or grated cheese after reheating makes it taste freshly made.
My sauce ended up way too runny/thick! What went wrong?
The liquid dance is tricky! Too runny? Let it simmer uncovered a few extra minutes before adding the sour cream, or even sprinkle in a tiny bit of instant mashed potato flakes (my grandmother’s trick). Too thick? Add broth a tablespoon at a time until it looks right. Remember that it’ll thicken as it stands, so when in doubt, err on the slightly too thin side. Your stove’s BTUs, altitude, pan size, and even the exact width of your noodles can affect liquid absorption—you’ll get a feel for it with practice!
Will this work in my Instant Pot, or am I asking for disaster?
It works beautifully in the Instant Pot! Use the sauté function for all the browning steps, then add the liquids and noodles, seal, and cook on high pressure for just 4 minutes with a quick release. Don’t be tempted to go longer or you’ll have noodle mush! Stir in the sour cream after releasing pressure. The timing is about the same overall when you factor in the pot coming to pressure, but it’s hands-off cooking time, which means you can help with homework or just sit down for five blessed minutes!